
This tutorial details how to deploy any one of HOSSTED’s fully supported apps from the Azure Marketplace, so that it is ready for use:
It contains the following sections:
- Deploying an app on Azure
- SSH verification
1. Deploying an app on Azure
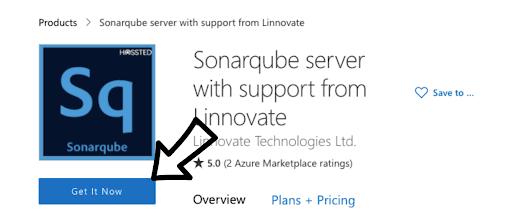
On the selected app page, click the blue Get it Now button.
The sign-in page to Azure appears. In the email address field, enter your email.
A pop-up box appears to create this app in Azure. Click Continue.
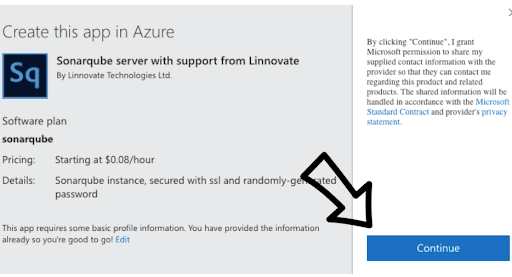
Click the blue Create button.

A screen with multiple fields appears.
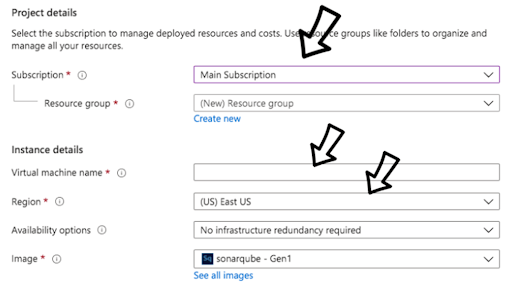
You may need to change the first field from your username to the subscription by using the options in the drop-down menu.
In this section, you can also change the resource group name, but Azure will automatically apply a new name based on the name of the VM.
The other fields may be left as is.
After filling in the fields, press the Review + create button.
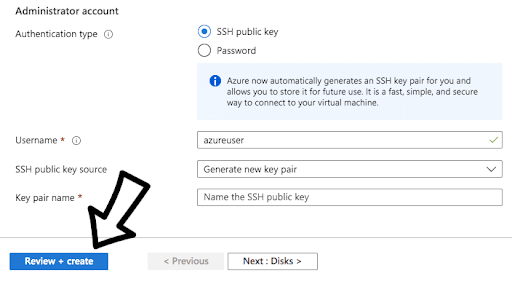
Azure will now run a final validation.
When validation is complete, the Create a Virtual Machine screen appears.
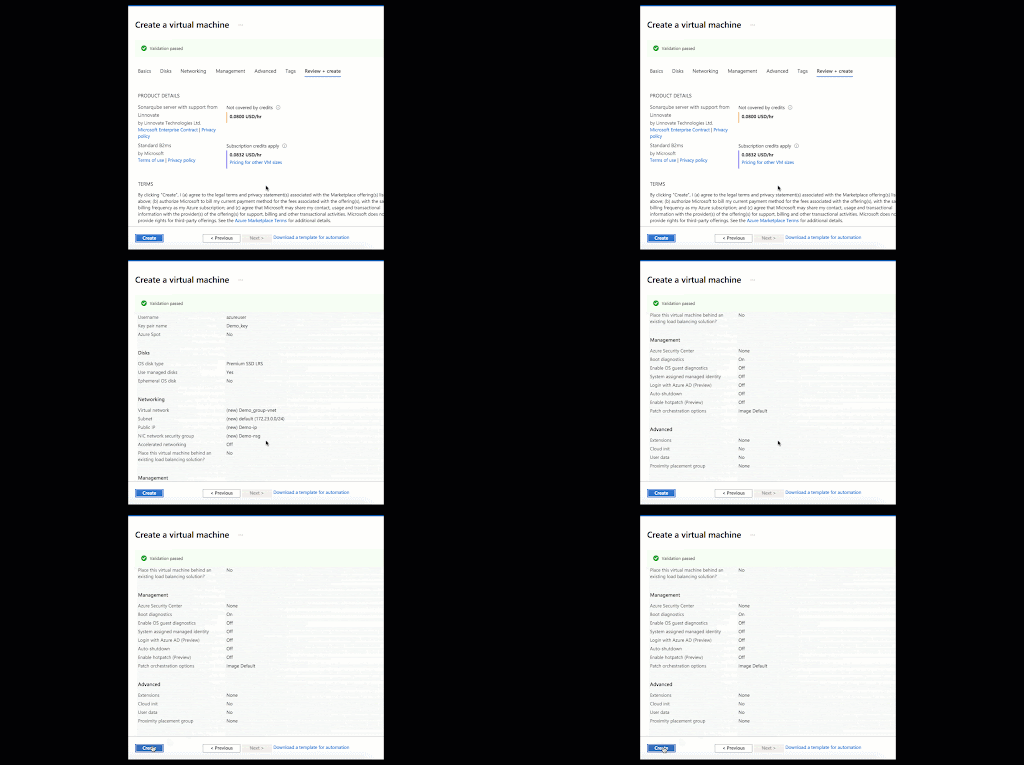
Click the blue Create button.
A pop-up will appear to generate a new key pair.
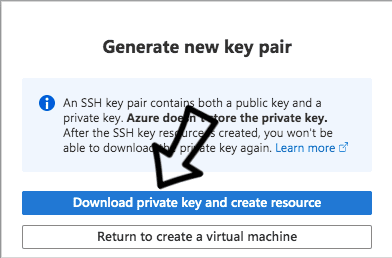
Click the blue Download private key and create resource button.
A Deployment is in progress screen appears.
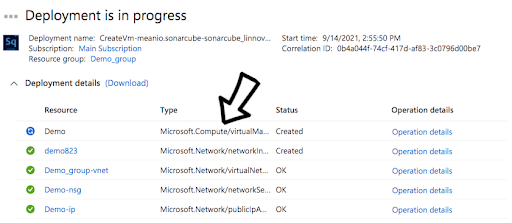
The first resource, underlined in blue, is the application.
A Your deployment is complete screen appears.
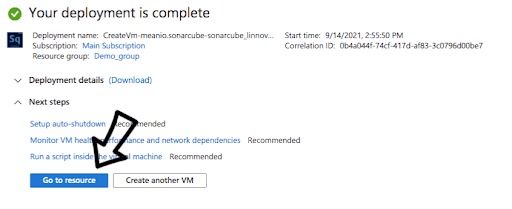
Click the blue Go to resource button.
The following screen appears:
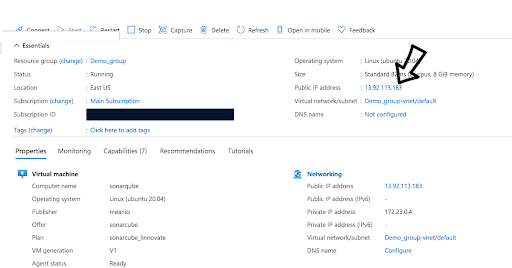
To reach your VM, locate the Public IP Address and paste it into your browser address bar. The page might take a few minutes to appear.
2. Login by SSH
There are two options for SSH login:
2.1. Using the command line on your computer. This is optimal for Linux and MacOS, which come with SSH pre-installed.
2.2. Downloading PuTTY, a popular and well-documented SSH client. This is optimal for Windows users.
2.1. Using the Command Line
Open your favorite terminal. Find the private key (.pem) file you downloaded during the Azure deployment process.
The default username on Azure is azureuser.
Type the following:
Chmod 600
ssh -i azureuser@
The following prompt appears:

Type yes.
After the VM deploys, a link appears to where the VM is available.
Copy the URL and log in with the provided credentials.
The deployment of your HOSSTED app is complete.
2.2. Downloading PuTTY
Download PuTTY here.
In the PuTTY window, enter the host name or public IP address of your VM into the Host Name (or IP address) field, and name it in the Saved Sessions field.
Click Save to save the new session so you can reuse it later.
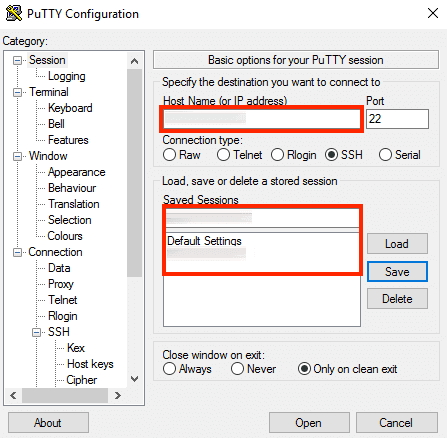
In the Connection -> Data section, enter the username azureuser in the Auto-login username field, under the Login details section.
In the Connection -> SSH -> Auth section, browse to the private key file (.ppk) you’ve previously obtained in the step above.
Select the session you want to start (in case you have more than one session saved) and click the Open button to open an SSH session to the server. PuTTY will first ask you to confirm the server’s host key and add it to the cache.
Click Yes to this request. You should now be logged in to your server.
For any questions, please contact HOSSTED’s expert DevOps team for one-on-one assistance, here.