Secure Shell access, in short – SSH, is used to safely access VM and to prevent unauthorized access. It is the client’s key to the VM.
The method of confirming the authorized access to the VM is set up during the VM creation stage. Linux and MacOS usually come with SSH pre-installed. If your VM OS doesn’t have one – you will need to install it yourself.
Generating an SSH key pair creates two long strings of characters: a public and a private key. The public key is placed on a server, and the SSH client using the private key can connect to that server.
Here’s how to connect a virtual machine with an SSH client
First, you’ll need to have an SSH key pair. If you never created one before, it’s possible to do so in your cloud provider. The most important thing is to save these two files in some secure place for future usage.
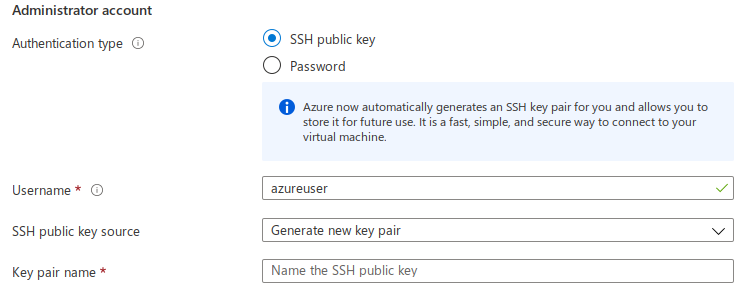
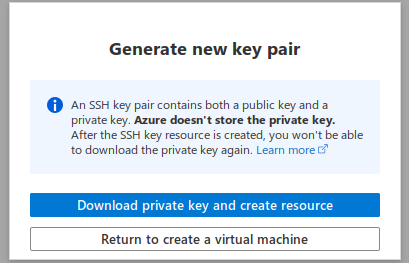
For example, in Azure you’ll see something like this:

After creating the SSH key pair, you’ll see a button to download your created key.

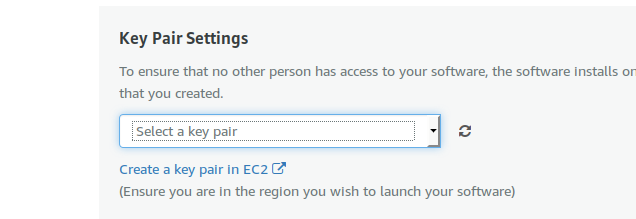
It’s a similar structure in AWS. When you’re creating your VM with a product, you can create your SSH key. This will save your key pair.
First

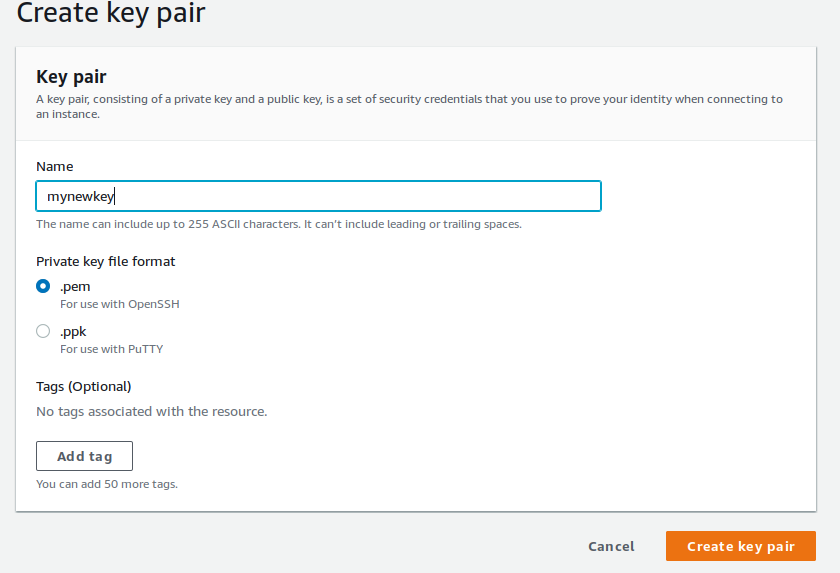
Then

After pressing the create button you’ll be able to download your private key.
If you’re still having trouble, please contact our support team here
With a successfully created key pair, you’ll be able to connect to the VM via SSH. With our HOSSTED products, we are always available to provide support if you get stuck on any steps.
Once you have the key pair, you’ll need to create the connection to the operating system. If you’re using Linux or MacOS then put your key where it’s possible to be read, and change permissions to 600. To run SSH it would look like this:
chmod 600 KEYFILE
ssh -i KEYFILE ubuntu@SERVERIP
Remember to replace KEYFILE in the previous commands with the path to your private key file (.pem), and SERVERIP with the public IP address or hostname of your server.
If you’re using Windows, it is a bit more tricky but not totally rocket science.
The most painless and common way is to download PUTTY a very popular and well-documented ssh client – Download here
After you run it you’ll be able to create a saved session for frequent use.
In the PUTTY window, enter the host name or public IP address of your VM into the “Host Name (or IP address)” field, and name it somehow in “Saved Sessions” field. Then, click “Save” to save the new session so you can reuse it later.

In the “Connection -> Data” section, enter the username ubuntu into the “Auto-login username” field, under the “Login details” section. In the “Connection -> SSH -> Auth” section, browse to the private key file (.ppk) you’ve previously obtained in the step above.
Select the session you want to start (in case you have more than one session saved) and click the “Open” button to open an SSH session to the server. PUTTY will first ask you to confirm the server’s host key and add it to the cache. Go ahead and click “Yes” to this request. You should now be logged in to your server.