When looking to deploy a new App on the Azure marketplace, you can face a lot of hurdles. This tutorial document will help you jump over all of those hurdles. Watch the tutorial here
If you’re still having difficulty, reach out to us here.
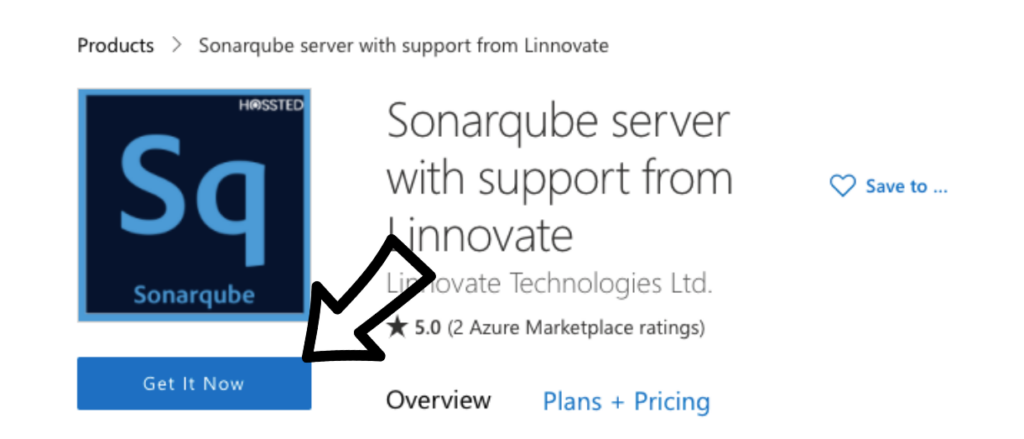
Finding the right application
To find applications first go to azure marketplace and click the blue Shop Now button. In the search bar at the top of the page, type the application you are looking for.
All of HOSSTED by Linnovate applications can be found by typing the name of the application + server ready with support from Linnovate. With Azure’s autocomplete search feature, our application will show up in the drop-down list.

Unsure if this is the right product for you? Look through the features, reviews, screenshots, and videos if available.
Found what you’re looking for and ready to deploy? Click the blue Get It Now button.
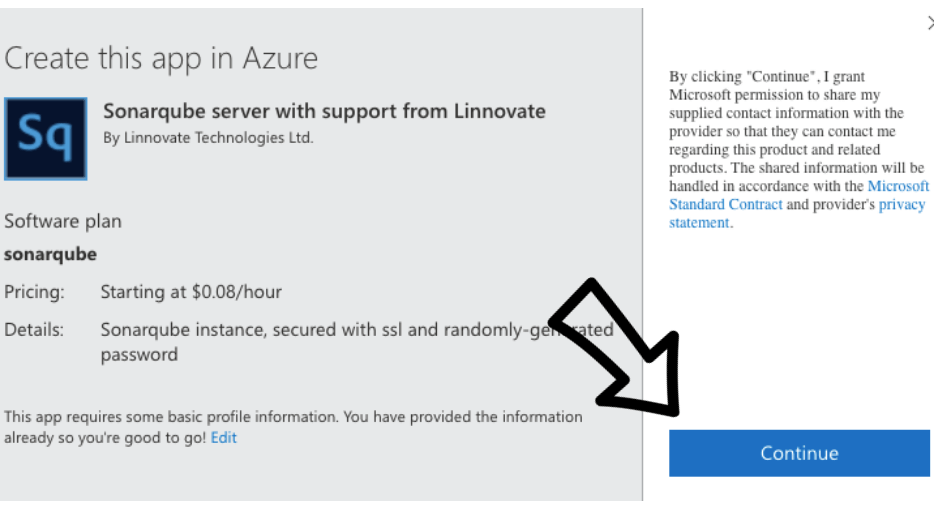
Once you’ve clicked Get It Now, you’ll be prompted to sign in to Azure. (Note: you may already be signed in to Azure.)
A pop-up box appears to create this app in Azure. Click Continue.
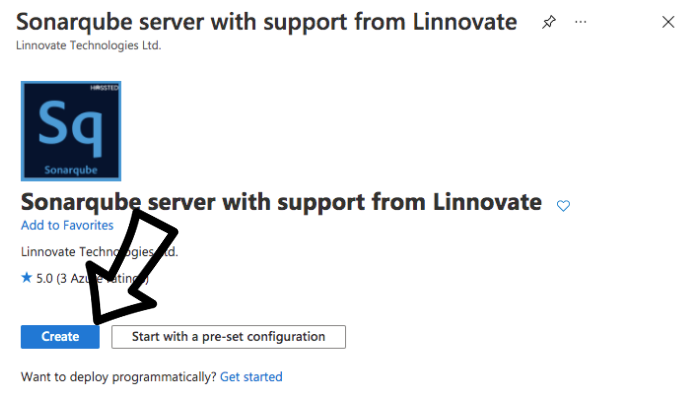
The next step is to click the blue Create button.
Deploying your App on the Azure Marketplace and running the Virtual Machine
The next screen will have multiple fields for you to fill in.
You may need to change the first field from your username to the subscription by using the options in the drop-down menu.
In this section, you can also change the resource group name but Azure will automatically apply a new name based on the name of the VM.
The next section is the instance details.
This is where you should name your virtual machine, select the region and choose the correct size.
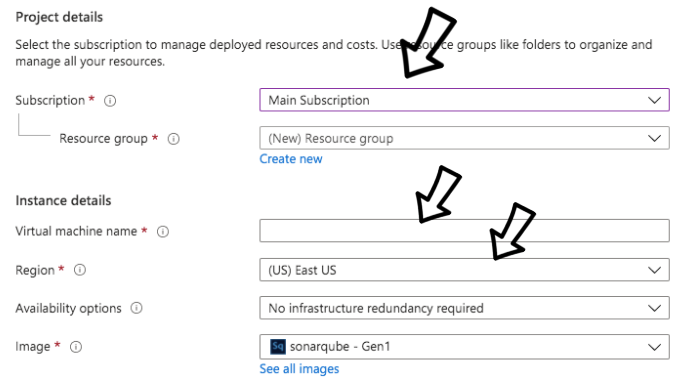
To deploy your app on the Azure marketplace, you don’t really need to touch any of the other fields. You can press Review and Create.
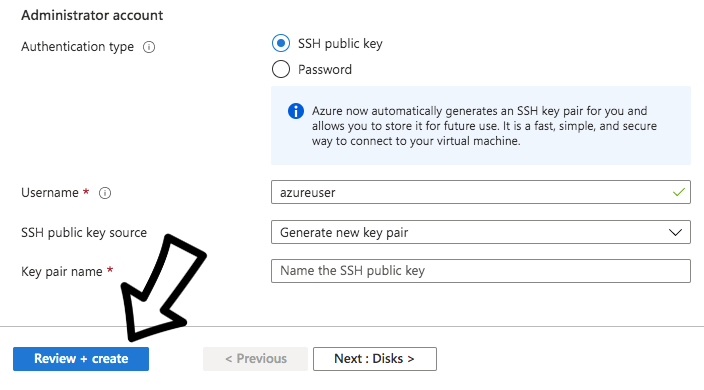
However, if you’d like further customization capabilities, click Next to go to the next step.
- Disk
- Networking
- Management
- Advanced
- Tags
The last screen is a Review and Create step and Azure will first run a final validation.
Once validated, the next screen will show the cost associated with the application.
Scroll down and click the blue Create button.

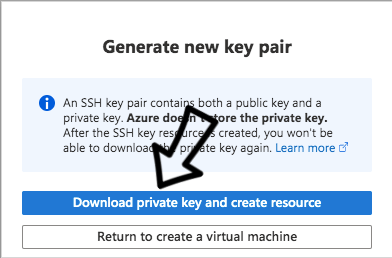
A popup box will appear to generate a new key pair.
Click the blue Download private key and create the resource button.
The next screen will display the progress of the deployment.
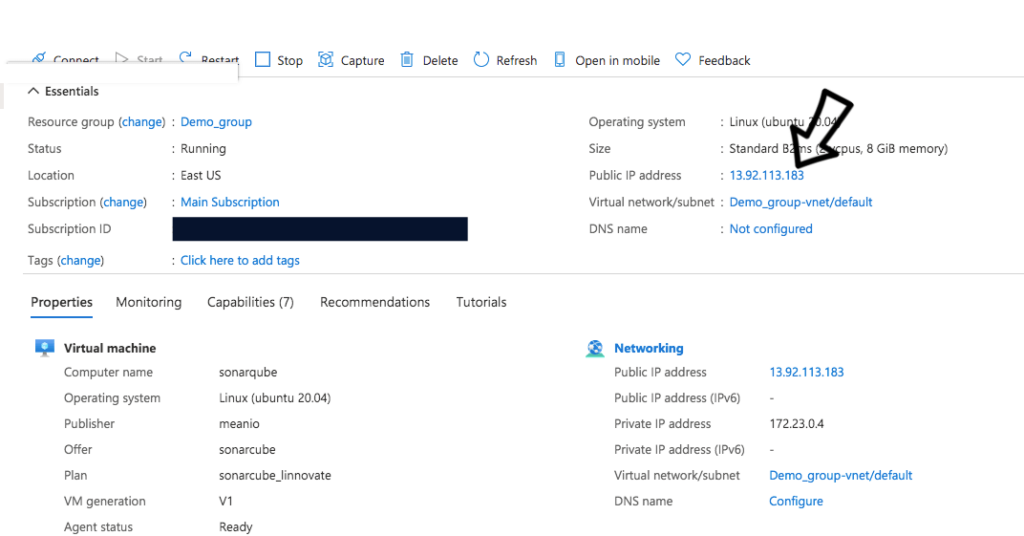
You’ll see a list of resources either deployed or in progress. The first in the list is the virtual machine, as can be seen in the Type section.
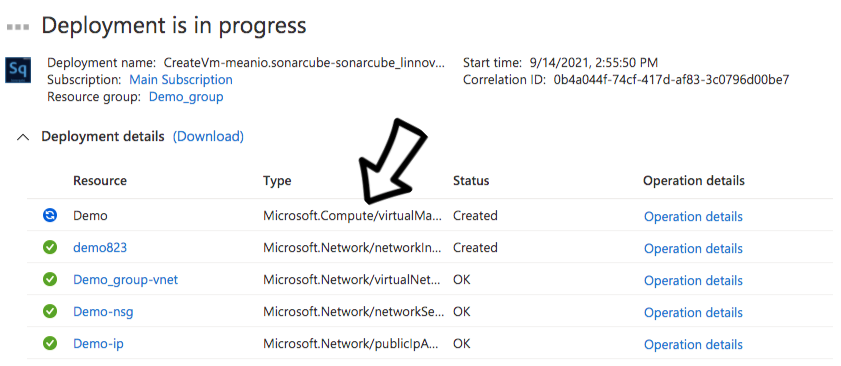
Once ready, you can see the application underlined in blue, listed as the first resource.
Accessing the Application
The next screen will provide the opportunity to go to the resource.
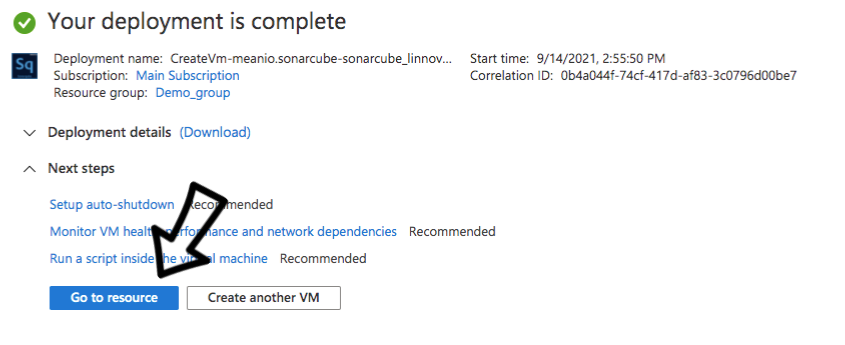
Click the blue Go to resource button.
The next screen is generally the first screen that presents a hurdle to our users because it’s not clear where to go from here.
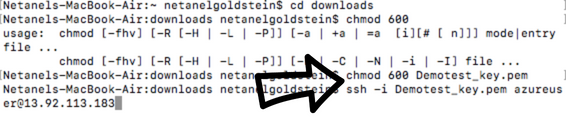
The next step is to open the command line system on your computer, whether that’s Terminal if you’re using a Mac or Command Prompt if you’re using Windows. If you’re not familiar with where it is, search in the Operating System search bar.
If you’re using PuTTY as an alternative SSH verification, here’s a link to that tutorial.
Once your command line system is open type the following
cd Downloads/
IF USING A MAC,use Chmod 600
Chmod 600
Chmod 600 <name of DNS>.pem
IF USING ANOTHER OS, CONTINUE HERE
Ssh -i <name of DNS>.pem accountname@<IP address>
You’ll then be prompted with this question.
The authenticity of host… are you sure you want to continue connecting (yes/no)?

Type: yes
It may take a minute or so to load.
After the VM deploys, you’ll see a link to where the VM is available. We’ve also tucked the login credentials to the product here for you.
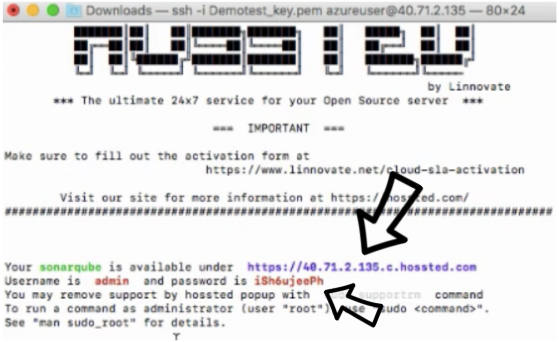
Copy the URL and log in with the provided credentials.
Happy Deployment!
We’re happy to have helped you deploy your new application.
If you are stuck and need support, please use the chat or form on this page
We also offer managed services. If you’d like to learn more, email us at [email protected]